

ProductPRODUCT
Featured products






Contact Us
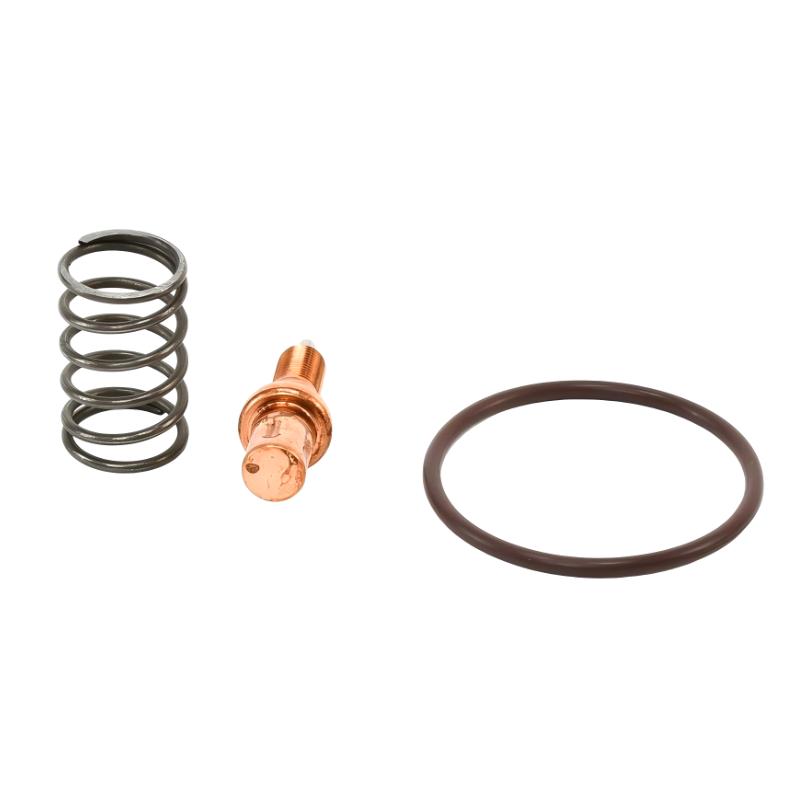
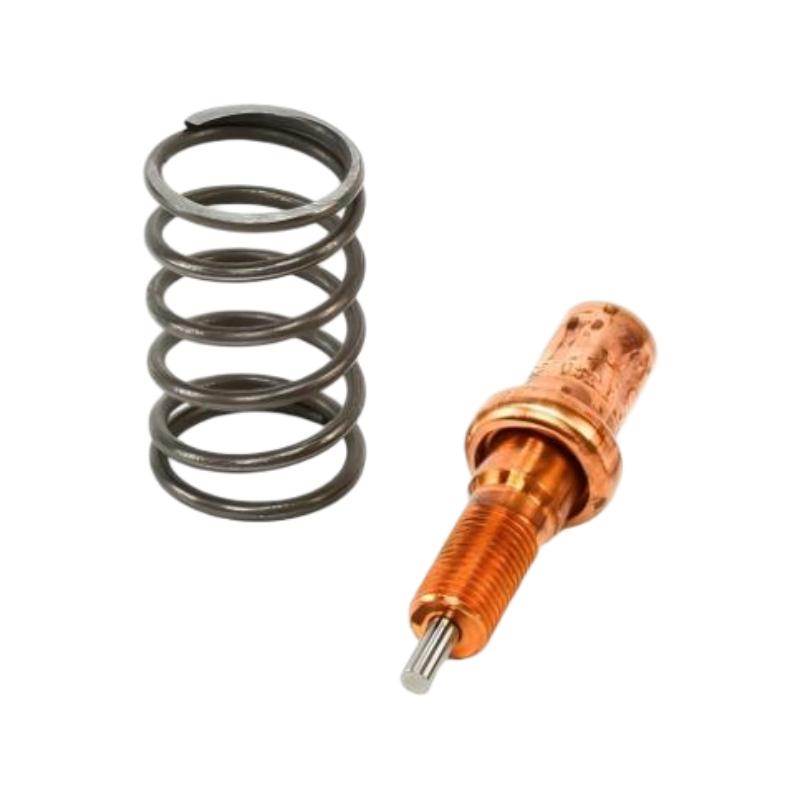
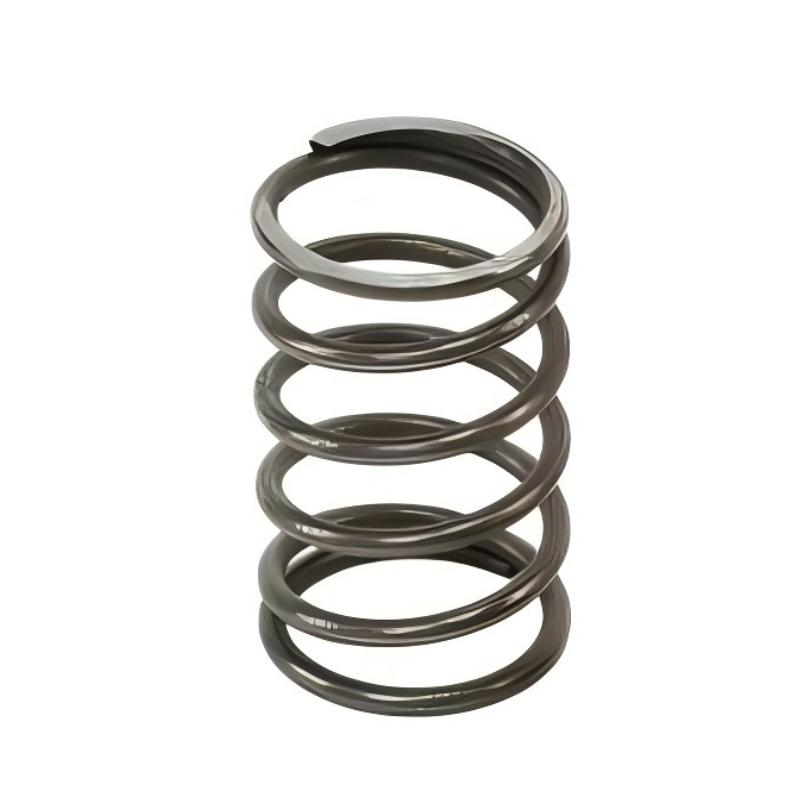
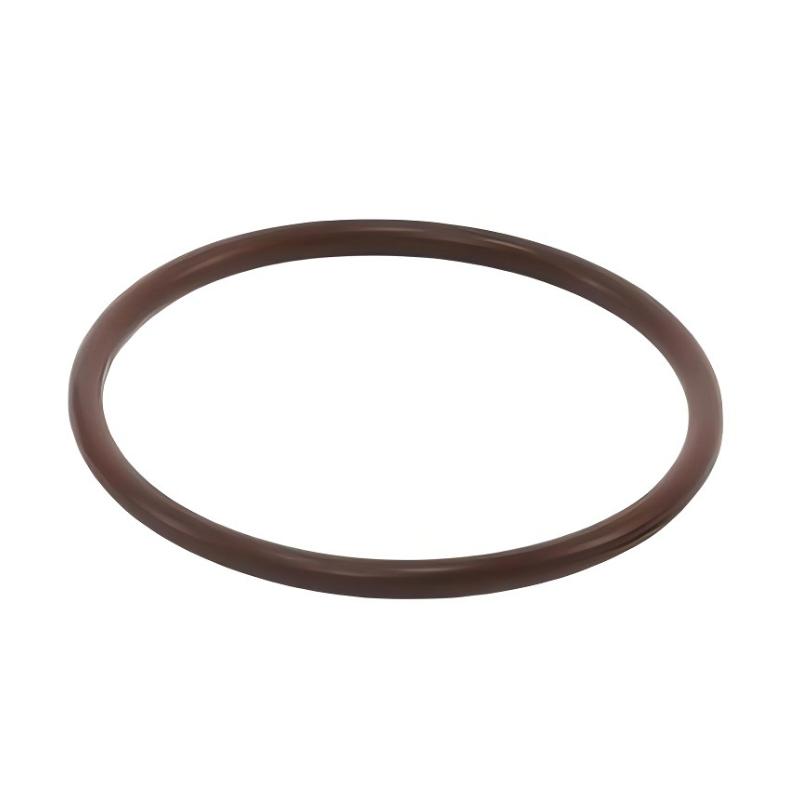
- Ingersoll Rand
- 47704430001 47690563001
- Temperature Control Valve Repair Kit
- USA
- 100 x 15 x 80 mm
- 0.15 kg
- Xiamen, China
- New & In Stock
- T/T, PayPal, Western Union
- 1 Year
- 1-3 Working Days
- DHL, UPS, TNT, FedEx and EMS.
- 24-Hour Service
- COO
- 79
Our advantage

Global Logistics
We have a 10-year logistics and express cooperation agreement, so our products can be shipped to any place in the world.

Brand new and original
Our products are imported in bulk from the place of origin. Because of the cooperative relationship, our products are all original and 100% new.

24-hour service
We provide 7*24 hours service to our customers. We will be there whenever you need us.

Price advantage
All our products are priced very favorably because we have our own warehouse and supply.
| Company Information | |||
| [email protected] | |||
| Mobile | +8615980777398 | ||
| +8615980777398 | |||
| 15980777398 |
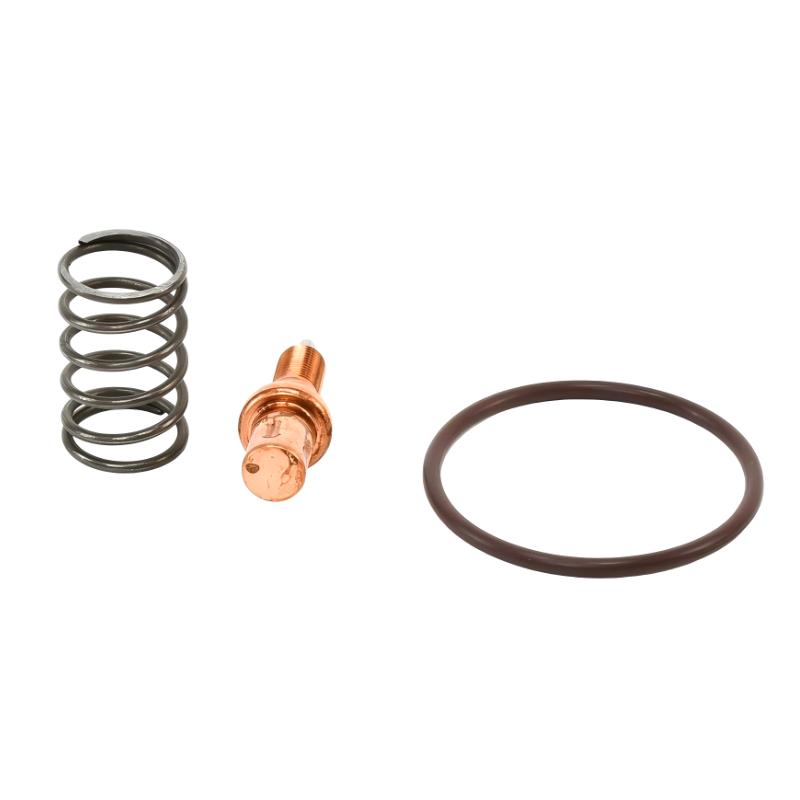
Product Overview
The Ingersoll Rand 47704430001 47690563001 Temperature Control Valve Repair Kit is a maintenance component intended for servicing the temperature control valve assembly in compatible Ingersoll Rand industrial compressor systems.
Temperature control is an important part of compressor operation. During normal operation, the control valve helps regulate the temperature of the circulating lubricant or oil by controlling the flow path through the cooling system. Maintaining the correct operating temperature helps support lubrication performance, reduce thermal stress, and maintain stable compressor operation.
The repair kit is used when the temperature control valve requires maintenance rather than complete replacement. Depending on the condition of the original assembly, replacing worn sealing elements or internal components can restore proper valve operation and help prevent temperature-related compressor faults.
The supplied product information is:
- Manufacturer: Ingersoll Rand
- Reference: 47704430001
- Part Number: 47690563001
- Product Type: Temperature Control Valve Repair Kit
- Application: Industrial Air Compressor Maintenance
- Dimensions: 100 × 15 × 80 mm
- Weight: 0.15 kg
- Primary Function: Temperature Control Valve Servicing
- Typical System: Compressor Lubrication and Cooling Circuit
Because repair-kit contents can vary by valve design and compressor configuration, technicians should verify the exact replacement components and assembly arrangement before beginning maintenance.
Technical Specifications
| Parameter | Specification |
|---|---|
| Manufacturer | Ingersoll Rand |
| Reference | 47704430001 |
| Part Number | 47690563001 |
| Product Type | Temperature Control Valve Repair Kit |
| Application | Compressor Maintenance |
| Dimensions | 100 × 15 × 80 mm |
| Weight | 0.15 kg |
| System Function | Temperature Regulation |
| Installation Location | Compressor Temperature Control Valve |
| Maintenance Type | Valve Repair / Overhaul |
| Primary Purpose | Restore Temperature Control Valve Performance |
The supplied dimensions and weight should be considered when preparing maintenance inventory and replacement parts.
Function and Working Principle
The temperature control valve is part of the compressor’s thermal-management system.
A simplified arrangement is:
Compressor
↓
Lubricating Oil Circuit
↓
Temperature Control Valve
↙ ↘
Oil Cooler Bypass Path
↓
Compressor Lubrication System
The valve responds to lubricant temperature and controls the flow path so that the compressor can maintain an appropriate operating temperature.
When the oil is relatively cold, the valve may direct a greater proportion of flow through a bypass path, allowing the system to reach operating temperature more efficiently.
As the oil temperature increases, the valve progressively directs more flow toward the cooler.
This process can be represented conceptually as:
Low Oil Temperature
→ More Bypass
→ Faster Warm-Up
Higher Oil Temperature
→ More Cooling Flow
→ Temperature Regulation
The repair kit is used to restore the mechanical components responsible for this regulating function.
Role in Compressor Systems
Temperature control is critical in lubricated compressors because oil performs several important functions:
- Lubrication
- Heat transfer
- Bearing protection
- Sealing
- Internal component cooling
If the oil becomes excessively hot, lubrication performance can deteriorate and thermal stress may increase.
If the oil remains excessively cold, moisture and condensation-related problems may become more likely, while the lubricant may not reach its intended operating characteristics.
The temperature control valve therefore contributes to maintaining the compressor within its intended thermal operating range.
Typical Applications
The 47690563001 repair kit may be used during maintenance of compatible compressor temperature-control valve assemblies.
Typical maintenance situations include:
- Valve leakage
- Incorrect operating temperature
- Valve sticking
- Damaged sealing elements
- Internal valve wear
- Poor temperature regulation
- Preventive compressor overhaul
The exact compressor models and valve assemblies compatible with a particular repair kit should always be confirmed before ordering or installation.
Installation Guide
1. Confirm the Replacement Part
Before starting maintenance, verify:
Ingersoll Rand 47704430001
47690563001 Temperature Control Valve Repair Kit
Compare the replacement kit with the existing valve assembly.
Check:
- Part number
- Component arrangement
- Sealing components
- Valve components
- Physical dimensions
- Existing valve configuration
Do not begin disassembly until the replacement components have been identified.
2. Shut Down the Compressor
Stop the compressor using the normal shutdown procedure.
Then isolate the machine from its energy sources according to the site’s lockout/tagout procedure.
The system should be:
- Shut down
- Electrically isolated
- Depressurized
- Allowed to cool
- Secured against accidental restart
Do not work on a hot or pressurized oil circuit.
3. Allow the System to Cool
The temperature control valve is associated with the compressor’s lubrication and cooling circuit.
Hot lubricant can cause serious burns.
Allow sufficient time for:
- Oil temperature to decrease
- Housing temperature to decrease
- Internal pressure to stabilize
Verify that the component can be safely handled before opening the system.
4. Prepare the Work Area
Prepare:
- Clean workbench
- Suitable hand tools
- Replacement repair kit
- Clean containers
- Approved cleaning materials
- New seals supplied with the repair kit
- Torque tools where required
Keep dirt and foreign particles away from the valve assembly.
Contamination inside the oil circuit can cause additional compressor problems.
5. Remove the Temperature Control Valve
Before removing the valve, inspect the existing assembly and record its orientation.
Mark:
- Flow direction
- Hose positions
- Pipe connections
- Valve orientation
Disconnect the relevant oil lines carefully.
Prevent dirt from entering open connections.
6. Disassemble the Valve
Disassemble the temperature control valve carefully.
Pay attention to:
- Spring position
- Valve element orientation
- Seal position
- Retaining components
- Internal moving components
Do not use excessive force.
If an internal component is stuck, determine the cause before attempting removal.
7. Inspect Existing Components
Inspect the removed valve for:
- Wear
- Scratches
- Corrosion
- Contamination
- Deformation
- Damaged sealing surfaces
- Sticking components
- Spring deterioration
A repair kit can restore the valve only when the primary valve housing and major mechanical components remain serviceable.
If the valve body is severely damaged, a complete valve replacement may be more appropriate.
8. Clean the Valve Housing
Clean the reusable valve components using an appropriate maintenance method.
Remove:
- Oil residue
- Dirt
- Carbon deposits
- Foreign particles
- Old sealing material
Avoid aggressive cleaning methods that can damage precision sealing or mating surfaces.
9. Install Repair Components
Install the components from the 47690563001 repair kit in the correct sequence and orientation.
Pay particular attention to:
- Seal direction
- O-ring position
- Valve-element orientation
- Spring location
- Retaining components
Do not reuse damaged sealing elements.
Lubricate seals only with a lubricant approved for the compressor system and compatible with the sealing material.
10. Reassemble the Valve
Reassemble the valve carefully.
Ensure that:
- Moving components operate smoothly
- Seals are seated correctly
- No seal is pinched
- Retaining components are installed
- Valve components are correctly aligned
If torque specifications are provided for the specific valve assembly, use the specified values rather than estimating tightening force.
11. Reinstall the Valve
Install the repaired temperature control valve into its original position.
Reconnect:
- Oil lines
- Fittings
- Mounting hardware
- Associated connections
Ensure that all connections are clean and properly tightened.
12. Restore the Compressor
After installation:
- Inspect the complete work area.
- Confirm all tools have been removed.
- Verify all fittings are installed.
- Confirm all protective components are in place.
- Restore the oil circuit.
- Restore electrical power according to the approved procedure.
- Start the compressor using the normal commissioning procedure.
Commissioning Procedure
After the repair, monitor the compressor carefully.
Initial Inspection
Check for:
- Oil leakage
- Abnormal noise
- Vibration
- Loose fittings
- Temperature abnormalities
Temperature Monitoring
Observe the compressor’s oil temperature as it moves from startup toward normal operation.
The temperature should increase and stabilize in a controlled manner rather than remaining excessively low or rising uncontrollably.
Leakage Inspection
Inspect the repaired valve and surrounding connections.
Even a small oil leak should be investigated because oil loss can affect compressor lubrication.
Functional Verification
Confirm that:
- The compressor reaches normal operating temperature.
- Temperature remains stable.
- No temperature-related alarms occur.
- Oil circulation is normal.
- No abnormal leakage is present.
Troubleshooting Guide
Problem 1: Compressor Oil Temperature Is Too High
Possible causes include:
- Temperature control valve stuck
- Valve not regulating correctly
- Cooler airflow problem
- Oil cooler contamination
- Incorrect oil level
- High ambient temperature
- Restricted cooling circuit
Recommended Checks
- Check the valve operation.
- Inspect the cooler.
- Verify airflow.
- Check oil level.
- Inspect for restrictions.
- Compare operating temperature with the normal operating range.
A temperature control valve that remains in an incorrect position can significantly affect compressor thermal performance.
Problem 2: Oil Temperature Is Too Low
Possible causes:
- Valve stuck in cooling position
- Valve internal component problem
- Excessive cooling
- Incorrect valve assembly
- Abnormally low ambient temperature
If the valve has recently been repaired, verify the internal component orientation and assembly.
Problem 3: Temperature Fluctuates
Possible causes:
- Valve sticking
- Contaminated valve
- Damaged internal components
- Incorrect seal installation
- Oil-flow instability
- Cooler airflow changes
- Sensor problem
Check both the mechanical valve and the temperature monitoring system.
Problem 4: Oil Leakage Around the Valve
Possible causes:
- Damaged seal
- Pinched O-ring
- Incorrect seal installation
- Loose connection
- Damaged sealing surface
- Housing damage
Do not simply tighten the fitting excessively.
Inspect the sealing components and mating surfaces.
Problem 5: Valve Sticks
Possible causes:
- Contamination
- Oil deposits
- Corrosion
- Damaged valve element
- Deformed spring
- Incorrect assembly
Disassemble and inspect the valve if sticking is confirmed.
Problem 6: Repair Does Not Resolve the Temperature Fault
If the repair kit has been installed correctly but the temperature problem remains, investigate the rest of the cooling system.
Potential causes include:
- Oil cooler restriction
- Fan problem
- Airflow restriction
- Temperature sensor fault
- Incorrect oil level
- Incorrect lubricant
- External ambient conditions
- Another lubrication-system problem
A temperature-control valve is only one part of the compressor thermal-management system.
Problem 7: Valve Makes Abnormal Noise
Possible causes include:
- Loose internal component
- Incorrect spring installation
- Valve vibration
- Oil-flow instability
- Damaged valve element
Stop and inspect the assembly if abnormal mechanical noise appears after repair.
Temperature Control Valve Fault Diagnosis
A systematic troubleshooting sequence is recommended:
Compressor Operating Temperature
↓
Temperature Sensor
↓
Temperature Control Valve
↓
Oil Flow
↙ ↘
Oil Cooler Bypass Circuit
↓
Compressor Lubrication System
This prevents technicians from assuming that every temperature problem is caused by the valve.
Preventive Maintenance
| Inspection Item | Recommended Check |
|---|---|
| Valve Housing | Inspect for leakage |
| Seals | Check for deterioration |
| Valve Element | Check movement |
| Spring | Inspect for damage |
| Oil Lines | Check for restrictions |
| Oil Cooler | Inspect cleanliness |
| Cooling Airflow | Verify condition |
| Oil Level | Check according to maintenance procedure |
| Operating Temperature | Monitor regularly |
| Temperature Sensor | Verify indication |
| Connections | Check for leakage |
| Valve Assembly | Inspect during overhaul |
Common Repair Mistakes
Reusing Damaged Seals
Old seals may appear usable but can leak after reassembly.
Replace sealing elements included in the repair kit when required by the maintenance procedure.
Installing a Seal Incorrectly
A seal that is twisted, pinched, or incorrectly positioned can leak immediately after startup.
Installing Internal Components Backward
The orientation of internal valve components can affect valve operation.
Record the original configuration before disassembly and compare the reassembled valve with the approved assembly arrangement.
Excessive Tightening
Over-tightening can damage:
- Threads
- Fittings
- Valve housings
- Sealing surfaces
Use specified tightening procedures wherever available.
Allowing Dirt Into the Oil Circuit
Contamination can damage valves, bearings, and other lubrication-system components.
Maintain a clean work area throughout the repair.
Repair Kit Inspection Checklist
Before returning the compressor to service, verify:
- Correct repair kit identified
- Valve housing inspected
- Old seals removed
- New seals installed correctly
- Internal components correctly oriented
- Valve movement checked
- Connections tightened
- Oil lines reconnected
- No tools remain inside the work area
- Oil leakage checked
- Compressor restarted correctly
- Operating temperature monitored
- Final inspection completed
Key Advantages
- Intended for temperature control valve maintenance
- Supports repair instead of automatically replacing the complete valve assembly
- Compact 100 × 15 × 80 mm supplied dimensions
- Lightweight 0.15 kg design
- Suitable for compressor maintenance inventory
- Helps restore temperature-control functionality
- Can address seal and internal valve wear-related problems
- Supports preventive maintenance programs
- Helps reduce unnecessary compressor downtime
- Useful for maintaining stable compressor operating temperature
Technical FAQs
What is the Ingersoll Rand 47690563001?
The 47690563001 is a Temperature Control Valve Repair Kit associated with the supplied 47704430001 reference.
What is the purpose of this repair kit?
It is intended to service a compatible compressor temperature control valve by replacing applicable worn or serviceable internal components rather than automatically replacing the complete valve assembly.
What are the supplied dimensions?
The supplied dimensions are 100 × 15 × 80 mm.
What is the supplied weight?
The supplied weight is 0.15 kg.
What does the temperature control valve do?
It regulates lubricant flow through the compressor cooling circuit to help maintain an appropriate operating temperature.
What happens if the temperature control valve fails?
Depending on the failure mode, the compressor may operate at excessively high or low lubricant temperature, or the temperature may fluctuate abnormally.
Why can compressor oil temperature become too high?
Potential causes include a malfunctioning temperature control valve, restricted cooler, poor airflow, incorrect oil level, high ambient temperature, or another cooling-system problem.
Why can the oil temperature remain too low?
A valve stuck in the cooling position, incorrect valve assembly, excessive cooling, or unusual ambient conditions can contribute to low operating temperature.
Can a repair kit fix every temperature control valve problem?
No. If the valve housing or major mechanical components are damaged, a complete valve replacement may be necessary.
Should the compressor be hot when the valve is repaired?
No. The compressor should be shut down, isolated, depressurized, and allowed to cool before maintenance begins.
Why is cleanliness important during valve repair?
The temperature control valve is part of the lubrication circuit. Dirt or foreign material can interfere with valve movement and contaminate the compressor oil system.
What should be checked after installing the repair kit?
Check valve connections, oil leakage, temperature behavior, cooling performance, abnormal noise, and compressor operating conditions.
Why does the temperature fluctuate after repair?
Possible causes include incorrect valve assembly, sticking components, contamination, oil-flow instability, sensor problems, or issues elsewhere in the cooling circuit.
When should the complete valve be replaced instead of repaired?
If the valve body, sealing surfaces, internal mechanical components, or other non-replaceable components are severely damaged, complete replacement may be more appropriate.
Conclusion
The Ingersoll Rand 47704430001 47690563001 Temperature Control Valve Repair Kit is a compact maintenance component intended for servicing compatible compressor temperature control valve assemblies. With supplied dimensions of 100 × 15 × 80 mm and a weight of 0.15 kg, it is convenient for compressor maintenance inventory and planned service operations.
The temperature control valve plays an important role in compressor thermal management by regulating lubricant flow through the cooling circuit. Proper valve operation helps maintain suitable oil temperature and supports reliable lubrication of internal compressor components.
Successful installation requires more than simply replacing the old components. The compressor must be safely isolated and cooled, the valve must be cleaned and inspected, replacement components must be installed in the correct orientation, and all seals and connections must be properly positioned.
After repair, commissioning should include careful monitoring of operating temperature, oil leakage, valve behavior, and overall compressor performance. If the temperature remains abnormal after valve servicing, technicians should investigate the oil cooler, airflow, oil level, temperature sensor, and other parts of the thermal-management system rather than assuming that the repair kit itself has failed.