

ProductPRODUCT
Featured products
Contact Us
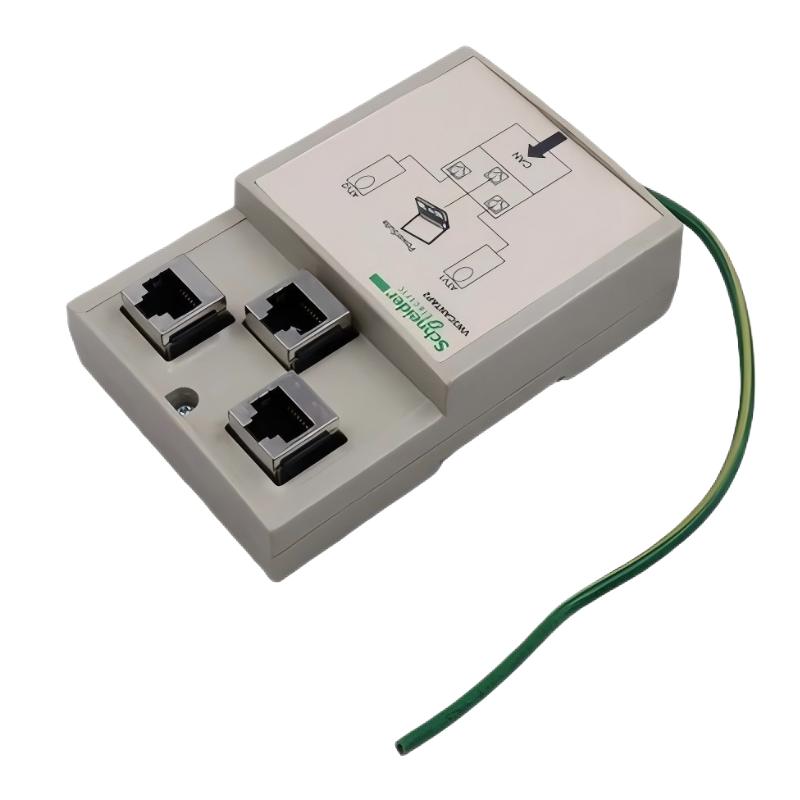
- Schneider
- VW3CANTAP2
- Connector Kit
- France
- 230 x 161 x 70 mm
- 0.48 kg
- Xiamen, China
- New & In Stock
- T/T, PayPal, Western Union
- 1 Year
- 1-3 Working Days
- DHL, UPS, TNT, FedEx and EMS.
- 24-Hour Service
- COO
- 3
Our advantage

Global Logistics
We have a 10-year logistics and express cooperation agreement, so our products can be shipped to any place in the world.

Brand new and original
Our products are imported in bulk from the place of origin. Because of the cooperative relationship, our products are all original and 100% new.

24-hour service
We provide 7*24 hours service to our customers. We will be there whenever you need us.

Price advantage
All our products are priced very favorably because we have our own warehouse and supply.
| Company Information | |||
| [email protected] | |||
| Mobile | +8615980777398 | ||
| +8615980777398 | |||
| 15980777398 |
1. Product Overview
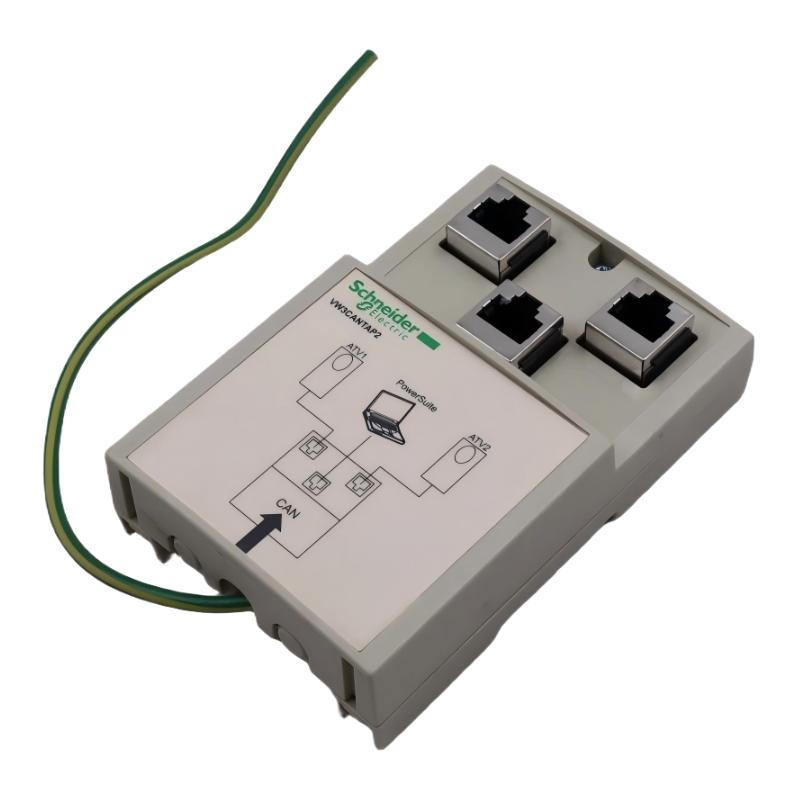
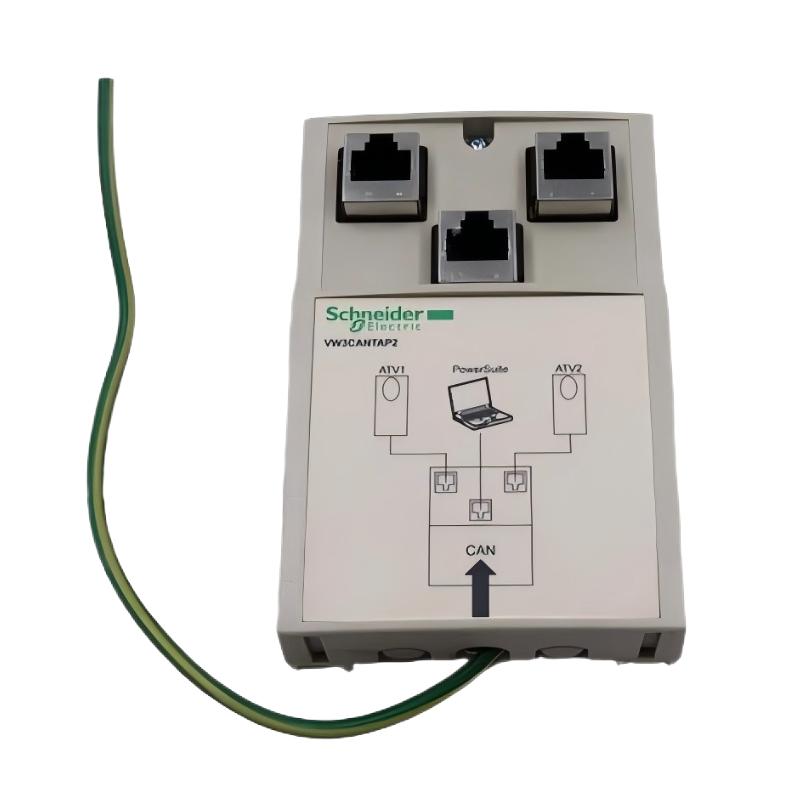
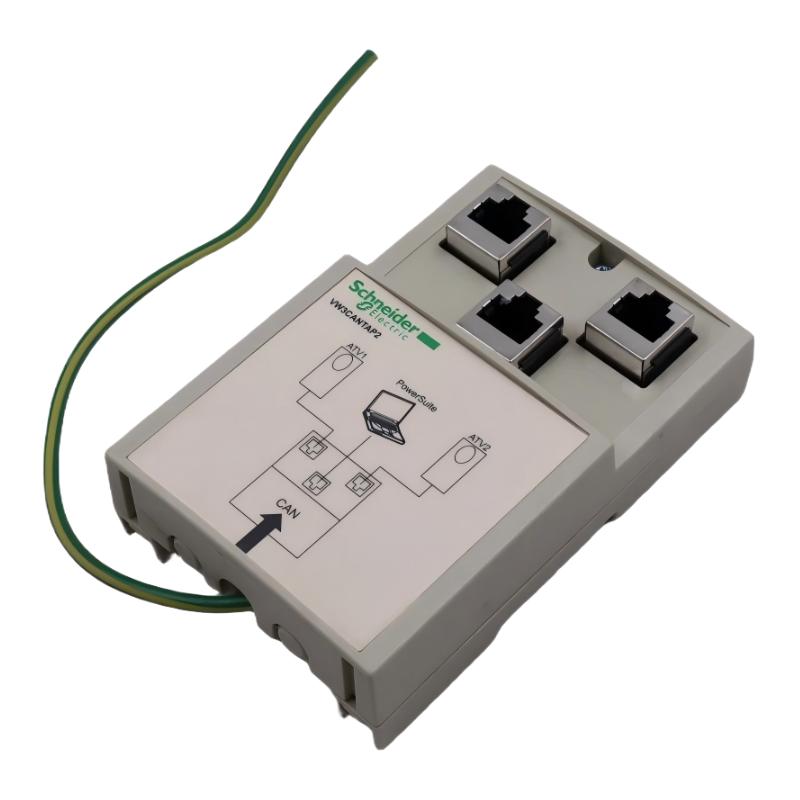
The Schneider VW3CANTAP2 Connector Kit is an industrial automation accessory intended to support electrical connectivity and equipment integration in compatible control system configurations. Connector kits provide the hardware required to establish designated connections between components, helping maintain an organized installation and supporting reliable system operation when correctly matched to the intended equipment.
With supplied dimensions of 230 × 161 × 70 mm and a weight of 0.48 kg, the VW3CANTAP2 can be evaluated for applications requiring a dedicated connector assembly or related connection hardware. Before purchasing or installing the kit, it is important to confirm its exact function, included components, connector arrangement, and compatibility with the target equipment.
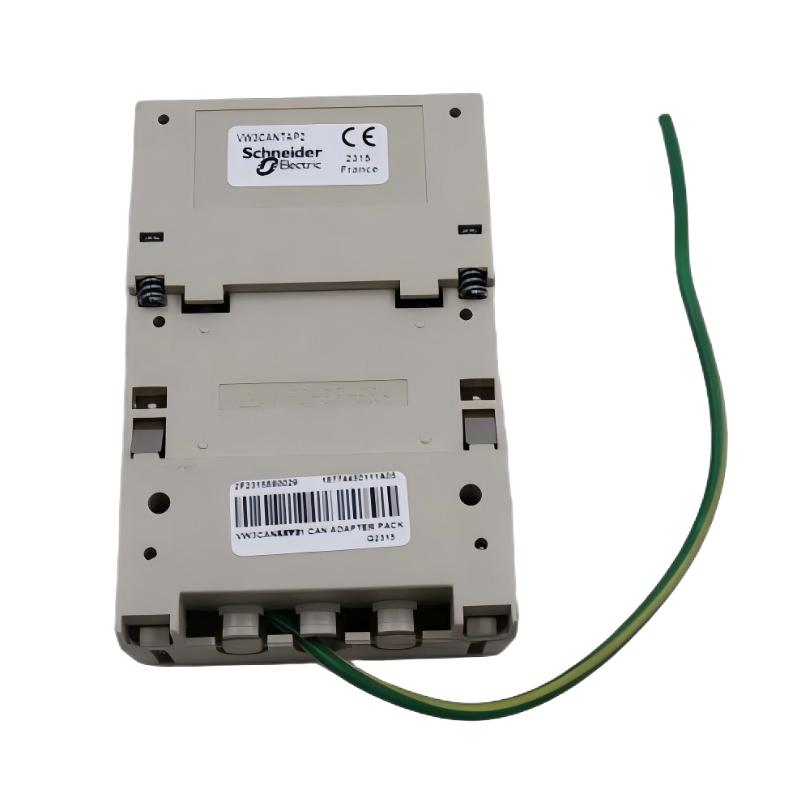
The model number alone does not establish the precise connection type, supported communication interface, or compatible devices. These details should be verified against the product label and applicable Schneider Electric technical documentation to avoid incorrect installation or equipment incompatibility.
2. Technical Specifications
| Parameter | Specification |
|---|---|
| Brand | Schneider Electric |
| Model | VW3CANTAP2 |
| Product Type | Connector Kit |
| Dimensions | 230 × 161 × 70 mm |
| Weight | 0.48 kg |
| Application | Industrial automation connectivity and equipment integration, subject to verification |
| Connector Configuration | Confirm from the product documentation |
| Kit Contents | Verify against the supplied parts list |
| Electrical Characteristics | Confirm according to the intended connection |
| Supported Interface | Verify for the exact model and application |
| Compatible Equipment | Confirm the approved equipment models |
| Installation Requirements | Follow the applicable installation instructions |
The dimensions and weight listed above are the supplied product specifications. The connector types, pin assignments, electrical characteristics, and exact contents of the kit should be confirmed before procurement or commissioning.
3. Function and Working Principle
A connector kit provides the components needed to establish a specified electrical connection between compatible devices or assemblies. Depending on its design, a kit may include connector bodies, contact elements, adapters, mounting hardware, or other dedicated connection components.
The Schneider VW3CANTAP2 should be used according to its documented function. Its exact role in an automation system must be confirmed before assigning it to a particular communication, control, or power connection.
In a typical industrial installation, connector components establish the required physical interface between equipment. When the connector arrangement, contact assignment, and electrical characteristics match the specifications of the connected devices, the connection can support the intended signal or electrical function.
Important considerations include:
- Connector compatibility: Confirm that the kit matches the designated equipment interfaces.
- Contact arrangement: Verify the pin or terminal assignment against the approved connection diagram.
- Electrical suitability: Check the required signal type and applicable voltage or current limits.
- Mechanical fit: Ensure that the connector assembly matches the equipment’s mounting and connection arrangement.
- Kit completeness: Confirm that all required components are included.
- System compatibility: Verify that the kit is approved for the specific equipment configuration.
Correct connector selection helps reduce connection errors and supports dependable equipment integration.
4. Role in Industrial Automation Systems
Industrial automation installations rely on suitable connectors to link equipment, establish electrical interfaces, and maintain organized wiring arrangements. Connector kits can be important when a system requires specific connection hardware rather than a generic connector.
4.1 Electrical Connectivity
A correctly matched connector assembly establishes the intended electrical connection between compatible components. Correct contact assignments and secure engagement are essential for dependable operation.
4.2 Equipment Integration
Control systems may contain drives, controllers, interface modules, and auxiliary devices with different connection requirements. Dedicated connector kits help provide the specified interface when selected for the correct equipment.
4.3 Control Cabinet Organization
Connector hardware can support orderly connections within electrical cabinets and machine assemblies. Engineers should check installation space, connector clearance, cable routing, and access for future maintenance.
4.4 Maintenance and Replacement
When a connector becomes damaged or a connection assembly is missing, the correct kit can help restore the intended installation. Confirming the full model number and kit contents reduces the risk of using an incompatible substitute.
4.5 Operational Reliability
Loose contacts, damaged connector housings, incorrect pin assignments, and unsuitable installation methods can cause intermittent faults. Proper installation and periodic inspection help reduce these risks.
5. Industrial Applications
The suitability of the VW3CANTAP2 depends on its verified function and compatibility with the intended equipment. Connector kits are commonly used in industrial environments where dedicated electrical interfaces are required.
5.1 Industrial Control Cabinets
Control cabinets contain interconnected electrical components that require appropriate connector arrangements. A compatible connector kit can help establish the intended connection while supporting an organized cabinet layout.
5.2 Motor Control and Drive Systems
Drive installations may use dedicated connection hardware for control, communication, feedback, or auxiliary interfaces. Before using the VW3CANTAP2 in a drive system, verify the exact application and supported equipment models.
5.3 Automated Machinery
Production lines, packaging systems, and material handling equipment use connectors to link compatible control and electrical components. Correct connector selection helps support maintainable wiring arrangements.
5.4 Modular Automation Systems
Modular systems may require specific connector assemblies to integrate components according to a defined architecture. The connector kit must match the intended interface and comply with the system’s electrical requirements.
5.5 Equipment Maintenance and Modernization
During repairs or upgrades, an existing connector kit may need replacement because of damage, wear, or changes to the installation. Before introducing the VW3CANTAP2 into a modified system, verify that its connection function and equipment compatibility remain appropriate.
These examples describe general industrial applications for suitable connector kits. They do not confirm compatibility between the VW3CANTAP2 and every equipment category listed.
6. Installation and System Integration
Correct installation is essential for maintaining connector integrity and establishing a reliable electrical interface. The following steps provide a general checklist; the model-specific installation instructions and site safety procedures take precedence.
Step 1: Verify the Product Model
Check the product label and confirm that the kit is identified as Schneider VW3CANTAP2. Compare the model with the system drawings, bill of materials, or existing approved connector assembly.
Step 2: Confirm Equipment Compatibility
Identify the equipment and interfaces that the kit is intended to connect. Verify the connector configuration, contact arrangement, electrical requirements, and approved equipment pairing.
Step 3: Isolate the Equipment
Place the system in a safe state and isolate relevant power sources according to the site’s lockout/tagout procedure. Follow the equipment manufacturer’s instructions before handling electrical connections.
Step 4: Inspect the Kit Contents
Check the supplied components against the applicable parts list. Inspect connector housings, contacts, mounting hardware, and other components for damage, contamination, deformation, or missing parts.
Step 5: Prepare the Connection Area
Ensure that the installation area is clean and provides adequate space for the connector assembly and associated cables. Check clearance, accessibility, and cable routing before beginning installation.
Step 6: Confirm Contact Assignments
Review the approved connection diagram and identify the required pin or terminal arrangement. Do not infer contact assignments from the connector’s appearance or the product name.
Step 7: Install the Connector Components
Assemble and install the kit according to the designated procedure. Ensure that components are correctly oriented and that any specified locking or fastening mechanisms are engaged.
Step 8: Check Cable Routing and Mechanical Support
Ensure that connected cables are supported appropriately and are not subjected to excessive tension, bending, or twisting. Keep the assembly clear of sharp edges and other potential sources of damage.
Step 9: Inspect the Completed Connection
Check connector engagement, mechanical stability, and the condition of the surrounding wiring. Confirm that the installation does not obstruct required access or interfere with adjacent components.
Step 10: Restore Power and Test
After completing the required safety and installation checks, restore power according to the approved commissioning procedure. Check equipment status and relevant diagnostics for any connection-related faults.
Step 11: Document the Installation
Record the kit model, connected equipment, and relevant maintenance information. Accurate records help technicians identify the correct replacement components in the future.
7. Common Problems and Troubleshooting
Connector-related faults may result from incorrect kit selection, damaged contacts, incomplete assembly, wiring errors, or problems in connected equipment.
| Symptom | Possible Cause | Recommended Check |
|---|---|---|
| Connector kit does not fit | Incorrect model or incompatible interface | Verify the model number and approved equipment pairing |
| Connection cannot be completed | Incorrect orientation or damaged components | Inspect the connector and review the installation instructions |
| Equipment does not recognize the connection | Incorrect contact assignment or incompatible hardware | Check the approved connection diagram and system configuration |
| Intermittent operation | Loose contacts, poor engagement, or damaged wiring | Inspect the connector assembly and connected cables |
| Connection faults after maintenance | Incorrect reassembly or missing components | Compare the installation with the parts list and approved procedure |
| Visible contact damage | Improper handling, contamination, or wear | Replace damaged components according to the approved procedure |
| Assembly becomes loose | Incorrect fastening or incomplete engagement | Check the specified locking and fastening arrangements |
| Fault persists after replacement | Problem with associated equipment or wiring | Review diagnostics and inspect the complete connection path |
7.1 Inspect Connector Engagement
Check that each connector is fully engaged and secured as designed. Inspect the housing and contacts for damage or contamination. Follow the required safety procedure before disconnecting any electrical interface.
7.2 Verify Contact Assignments
Incorrect contact assignments can prevent normal operation or damage equipment. Compare the connection with the approved wiring diagram before energizing the system.
7.3 Check Kit Completeness
Missing contacts, fasteners, or other components may prevent correct assembly. Compare the kit contents with the designated parts list and obtain any missing items before installation.
7.4 Review Equipment Diagnostics
If the connector assembly appears correctly installed, inspect the connected equipment for diagnostic messages. The underlying fault may originate from a cable, interface, power supply, or system configuration rather than the kit itself.
7.5 Avoid Improvised Repairs
Do not bend contacts, alter connector housings, or substitute unverified components to force a connection. Use approved replacement parts and follow the applicable repair procedure.
8. Preventive Maintenance and Reliability
Regular inspection helps identify connector problems before they cause equipment interruptions.
- Inspect connector housings: Check for cracks, deformation, and other visible damage.
- Check contact condition: Look for contamination, corrosion, or bent contacts where visible.
- Verify mechanical engagement: Ensure that locking and fastening mechanisms remain secure.
- Inspect associated cables: Check for damaged insulation, excessive bending, and strain near connector ends.
- Maintain clean installation conditions: Prevent dust, moisture, and other contaminants from affecting the connection.
- Monitor recurring faults: Record connection-related alarms and investigate repeated symptoms.
- Maintain spare-parts records: Keep the full model number and kit contents information in the maintenance inventory.
- Use approved replacements: Replace damaged components with the specified parts or a documented equivalent.
Maintenance intervals should reflect the operating environment, system criticality, and site maintenance policy.
9. Compatible System Components
The following component categories may be relevant when evaluating the VW3CANTAP2. This list does not confirm compatibility with any specific model.
| Component Category | Verification Requirement |
|---|---|
| Variable speed drive or motor control equipment | Confirm the exact equipment model and designated connector interface |
| Controller or control interface | Verify the intended connection function and supported interface |
| Communication or interface module | Check connector type, contact arrangement, and electrical requirements |
| Connecting cable | Confirm connector compatibility and approved cable specifications |
| Mounting or fixing hardware | Verify the required mechanical arrangement |
| Auxiliary automation equipment | Confirm that the kit is approved for the intended application |
Compatibility should be established using the complete equipment configuration and the applicable technical documentation.
10. Replacement and Alternative Selection
When replacing the Schneider VW3CANTAP2 Connector Kit, verify its intended function and mechanical and electrical requirements before selecting an alternative.
| Selection Factor | What to Verify |
|---|---|
| Exact model | Confirm VW3CANTAP2 against the original installation records |
| Dimensions | The supplied dimensions are 230 × 161 × 70 mm |
| Weight | The supplied product weight is 0.48 kg |
| Connector configuration | Confirm the required connector type and contact arrangement |
| Kit contents | Verify the included components against the parts list |
| Electrical suitability | Check the connection function and applicable electrical limits |
| Mechanical fit | Confirm mounting points, clearance, and assembly requirements |
| System compatibility | Verify the intended equipment models and connection arrangement |
| Product condition | Inspect the kit for damage, corrosion, or missing components |
A connector kit with similar dimensions or appearance is not necessarily interchangeable with the VW3CANTAP2. Differences in contact arrangement, mechanical design, or intended function may prevent correct operation. Use an alternative only after its suitability has been verified.
11. Key Benefits of Correct Connector Kit Selection
Selecting the correct connector kit supports several general objectives in industrial automation.
Reliable electrical connections: Correctly matched connector components help establish the intended connection between compatible devices.
Organized system integration: A designated connector assembly can help maintain the planned wiring and equipment arrangement.
Simplified maintenance: Accurate product identification makes it easier to locate the correct replacement kit and associated components.
Reduced installation errors: Verifying connector configuration and contact assignments helps prevent incompatible connections.
Improved serviceability: Proper installation and clear maintenance records support efficient troubleshooting and component replacement.
These benefits depend on correct product identification, suitable installation, and verified compatibility with the connected equipment.
12. Technical FAQs
Q1: What is the Schneider VW3CANTAP2?
The Schneider VW3CANTAP2 is identified in the supplied product information as a connector kit for industrial automation equipment. Its exact function and approved equipment pairing should be confirmed from the applicable technical documentation.
Q2: What are the dimensions of the VW3CANTAP2?
The supplied dimensions are 230 × 161 × 70 mm.
Q3: What is the weight of the VW3CANTAP2?
The supplied product weight is 0.48 kg.
Q4: Which equipment is compatible with this connector kit?
Compatibility depends on the kit’s intended function and connector interface. Confirm the exact supported equipment models before purchasing or installing it.
Q5: Does the kit include all the required connector components?
The supplied information does not establish the exact kit contents. Check the product parts list and packaging before beginning installation.
Q6: Can the VW3CANTAP2 be used with any Schneider Electric drive?
No. The correct equipment pairing and intended connection must be verified. The Schneider Electric brand alone does not establish compatibility.
Q7: What should be checked before installation?
Confirm the model number, kit contents, connector configuration, contact assignments, electrical requirements, and approved equipment combination.
Q8: Can a similar connector kit be used as a replacement?
Only if its connector arrangement, electrical characteristics, mechanical fit, kit contents, and system compatibility have been verified. Similar appearance or dimensions alone are insufficient.
Q9: What should be done if the connection does not work after installation?
Check the connector engagement, contact assignments, associated cables, and equipment diagnostics. If the fault persists, inspect the wider connection path and follow the approved troubleshooting procedure.
13. Conclusion
The Schneider VW3CANTAP2 Connector Kit is an industrial automation accessory with supplied dimensions of 230 × 161 × 70 mm and a weight of 0.48 kg. Correct connector selection is important for establishing suitable electrical interfaces, integrating compatible equipment, and supporting efficient maintenance.
Before purchasing or installing the VW3CANTAP2, verify its exact function, kit contents, connector configuration, electrical characteristics, and compatibility with the intended equipment. Proper assembly, careful contact handling, regular inspection, and accurate spare-parts records help reduce avoidable connection faults and support reliable industrial automation operation.